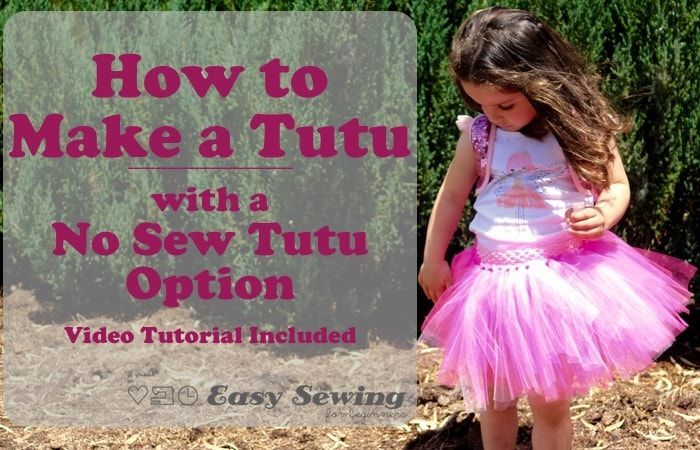
14 fabric crafts For Kids tutus ideas
No Knot Tying Fabric Tutu Tutorial

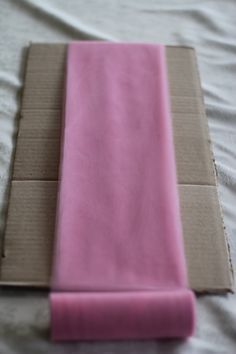
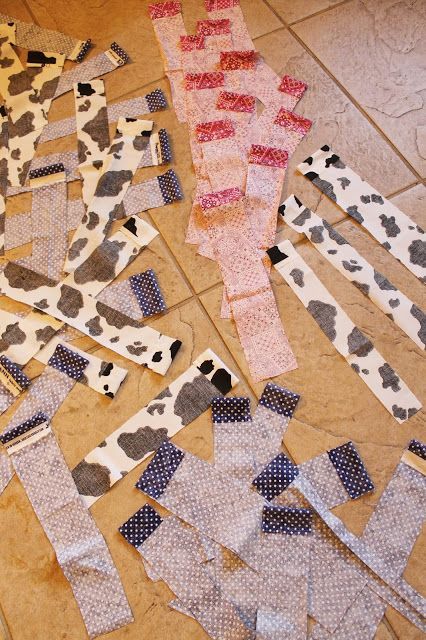
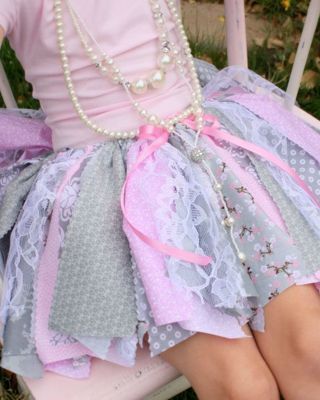
Miss Kopy Kat: No Knot Tying Fabric Tutu Tutorial…make DIY shabby fabric tutus easily and quickly. Do you need a fabric tutu for a Halloween costume for yourself or a little one? Here is an easy and quick way to make one with no knot tying involved! My daughter-in-law asked me to make a fabric tutu in a cowgirl theme for my two year old grand daughter. Morgan in the end result tutu with jeans underneath I have not made one before so I looked at tutorials for them on the internet. The ones I saw involved tying the fabric strips in knots onto elastic or ribbons. The tutus were really cute but could look bulky around the waist due to the knots. Also there seemed to be different opinions about the best way to tie the knots. I decided to try a different way to make the fabric tutu. It turned out to be very easy and quick! Almost no precision required! Morgan with her cowgirl boots and tutu. She will have more cowgirl accessories when she wears this for Halloween. Instead of tying the fabric strips, you make a loop at the top of the strip to run elastic or ribbon through. The result is a less bulky and more uniform waistband. You can use fabric you already have at home but we needed to buy fabric. I didn’t know how much to get so I ended up having way too much fabric. If you are mixing the fabrics, you probably only need 1/4 yard of each fabric (if you are making the tutu for a girl… a teenager or adult will need more). You can make a tutu fit almost any theme, color or occasion by the fabrics you choose to make it with. You can cut the strips in any width you want to. I thought that about three inches looked best. To figure the length of the strip, decide how long you want the tutu (factoring in if you want to cut the ends of the strips on the diagonal when the tutu is finished) and add one and one half inch (if your elastic or ribbon is about 1″ wide…if it is wider add that width plus 1/2″) for the loop. For the two year old, I made the strips 13 1/2″ long. To make the loop for the elastic or ribbon to run through, turn 1 and 1/2″ (if your elastic or ribbon is about one inch wide) to the backside of the fabric and glue (or sew) along the edge of the fabric. The elastic I used was 3/4″ so I allowed about 1/2″ for the glue (or sewing) to secure the loop on the fabric. Press the glued edge onto the backside of the strip being sure to leave the width of your ribbon or elastic unglued next to the fold. I tried a real fabric glue and an Aleene’s glue to see if both worked (they did) and if there was any difference (I could not tell a big difference). They both seemed to be holding well. The “Liquid Thread” came from JoAnn’s. Originally $10 but I used a 50% coupon. The “sewing machine in a bottle” glue says that it is washable. The Alleene’s glue is not washable. Honestly, any shabby fabric tutus should probably be considered “spot clean only”. The unfinshed edges would unravel a lot in a washing machine or even hand washing. Oooppps! The loop in the picture is out of focus…my bad. Anyway you get the idea…only glue the edge. You can decide how full you want the tutu to be. The ones I made had 30 to 40 strips each in them. After the glue dries (about an hour) you can assemble the looped fabric on the elastic or ribbon. The elastic that says “non roll” works better for this project. Only $2.29 at JoAnns in the sewing notions area. Put a large safety pin on the end of the elastic sideways while you are stringing the looped fabric strips on to it to keep them from sliding off of the end. Grosgrain ribbon (I used about 1″ wide) is best if you are using ribbon for the waistband. Put a safety pin on the end of the ribbon to make it easier to run through the fabric loop. Scrunch the fabric strips together along the elastic or ribbon. It gives a gathered look and fullness without the bulk of tying fabric strips into knots. This method also has all of the “good” or “right” side of the fabric facing outwards. If you are using ribbon as the tutu waistband, be sure to leave plenty of extra ribbon on either end for tying a bow. If you are using elastic, allow a few extra inches (beyond actual waist size) to overlap for pinning the ends. You may need to adjust the length of the elastic after you try the tutu on to get it snug enough to hold the tutu up but not too tight. Actually once you get the elastic the right size it would be better to sew the ends of the elastic together to avoid having the possibility of the safety pin popping open…not good for the wearer or the tutu. The ribbon waistband is a one-size-fits-most but it may need to be re-tied with a lot of activity. Just put it on like an apron and adjust the gathers along the ribbon. With the loops, the fabric can move to get wider or narrower as needed. The above photo shows the back of a tutu made with ribbon waistband. When the tutu is not in use, tie ends of the ribbon back in a bow so the strips won’t accidentally slip off. You could glue or sew the end strips on each side in place after you determine where along the ribbon they naturally “come together” when the tutu is tied snugly on the wearer.. The elastic waistband stays snugger but needs to be close to the waist size and would benefit from a little bit of sewing overlapped ends together. Just in case you DO sew, this tutu can have it’s loops made on a sewing machine instead of gluing. You can sew a loop on each strip and then string them on the waistband or you can do it in assembly line fashion. It’s easier to have the fabric strips stacked up in the order you want them on the waistband so you can sew one after another if you are sewing them like they would in a factory. I thought about ironing the loop at the correct measurement so I wouldn’t have to stop an measure each loop while sewing but I was lazy and just sewed the bottom of the loop while the ribbon was in it. That way I knew the ribbon would fit through the loop without measuring. Just be sure you don’t “catch” or sew the ribbon if you decide to try this method. I would stop sometimes and scrunch the sewn fabric strips along the ribbon and make sure they were not coming off the other end of the ribbon. You can leave the ends of the strips flat or you can cut them. For the cowgirl tutus I cut each strip on the diagonal. I somewhat tried to do an opposite angle cutting each strip around the tutu but nothing about these tutus has to be exact. These tutus are SO easy with the glue OR sew method. I used the left over material to make three more tutus for my seven year old grand daughter, Lilly, and her playmates in no time. The two taller girl’s, Lilly and Maggie, tutus strips started out as 16 1/2″ long. Bernadette’s tutu strips started out as 15″ long. Life is just more fun in a tutu! These tutus would be a good girl party craft. Just have the fabric strips ready to go and the girls could string them on a long ribbon. Because I didn’t want to ruin the cowgirl fabrics if my plan had not worked out, I bought some extra fabric to experiment with. The experimental tutu was all one fabric but constructed the same way. I’m adding this picture since it is hard to see the pattern of the fabric in the photos. Morgan wore the trial run tutu to the pumpkin patch with her pink cowgirl boots, leggings and a t-shirt. They don’t call these “shabby” tutus for nothing. Since the edges of the fabric strips are not finished off, there will be fraying. Just cut off the strings if they bother you. On that tutu I cut each strip into a “fishtail” shape. By the way, it doesn’t have to be Halloween to make a cute, fun and easy tutu. Girls like them all year long!